strategy - Builds - Guides
Dominate your world
Introduction Before going too far down this abyss, we strongly recommend you reading our starter guide (here) if you’re a fresh Realm. For the purposes of this guide, we are going to assume you satisfy the following conditions:
To make this easy to understand, we’ll be covering all the different pieces of Endless chronologically rather than by topic. The reason for this is because Endless, unlike other content, requires quite a few different moving pieces in order for you to maximize gains. Don’t worry if you can’t make the stars align for every run, think of this as the ideal blueprint. With that, let’s get into it.
3 Comments
Introduction Welcome to tier 10 and welcome to Realmshifter! Realmshifter is a class that specializes in speed. Fast dungeons, fast PvP, and (after setting up) fast raids. This guide will take you through everything you need to get started as Realmshifter; general gameplay, essential skills, pets, starter gear, and the spec that’ll be your best friend until at least level 235. By the end of this guide you’ll be confidently completing dungeons, smashing through PvP, and taking on The Morrigan. Passive abilities breakdownResurgence states that “You will become more powerful as your HP decreases in battle.” This means starting at 50% HP, all your stats (attack, defenses, dex for dodging, etc.) will start increasing for a maximum of a 2X gain when your health reaches 1%. When you see the term “redline” mentioned, they are talking about this effect where a Realm is strongest at that last sliver of HP. With resurgence maximizing stats at 1HP, this means ward is a Realm’s new effective health. To repeat, HP keeps you alive up until Tier 9, whereas ward keeps you alive starting at T10 as a Realm.
High Tenacity says “damage taken from some self-inflicted status effects will not fully deplete your HP.” Practically, this means berserk (triggered by skill, pet like chimera, or via consumables like mushroom) cannot kill you when you are at 1HP. As berserk is a main source of damage buffs (and defense too in the case of berserk 2 and berserk 3), high tenacity works seamlessly with resurgence above like peanut butter and jelly: you can stay at 1HP without killing yourself from your own damage boosting buffs. This does not cover other damage over time afflictions such as bleed, toxic, curse, burn, etc. and those will still pierce the ward and kill you easily at 1 HP. Mystic Feather says “your chance to dodge attacks increases as damage is taken.” This means your dodge rate is the highest it can be when you’re sitting at 1HP and is a key part of a Realm’s defenses in raids. Build Intro This build was born out of a desire to get away from the tedium of heretic endless runs and a realization that dragon align synergizes well with the Questing weapons, as well as the other benefits Dragon Align provides, namely elimination of Nidhogg as a threat. Inspiration was taken from Shabbash’s previous swash endless video. Buffing PhaseBuffing is done as Beo/Raider and it is quick. It can be done while at a wayvessel as well but it will take longer as you will have to regen mana with Guts for Ward of Balor/Annwn casts. We only need the basic four elemental resists as Realmshifter has natural Light/Dark immunity. With Outpost access resistances are gotten through Fey Yeti first and Zerk 1 from Chimera. If Chimera follower is not possible, you can get Zerk 1 through the Zerker spec or Chimera Raid weapons.
Stacking any Realmshifter Swash build full of crimson pinions creates a delicate balancing act between available mana and your maximum attack stat. So by using Fey Arrows as our off-hand we can forget about balancing mana and in-fact forget about mana entirely and smash out arena wins using the Volley 3 off-hand skill instead. Farming arena is ideal for accumulating Greater Souls, a fairly rare material that's used to upgrade a tonne of endgame items. 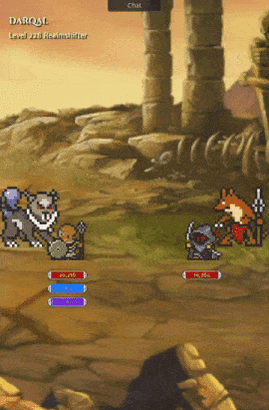 |
AuthorShabbash has been playing Orna since the summer of 2019, reaching max level 250 a year later, and has a vast plethora of experience within the game. After completing and surviving the grind, Shabbash now turns his attention to creating the best guide resources for players to improve their enjoyment of what Orna has to offer. Categories
All

Orna EventsNext event:
Orna Champions III Live PvP Tournament Win the "Fallen Champion" in-game title! Begins 13th March 2023 |


 RSS Feed


